OpenGL Window Example
注意: 这个示例展示了如何使用 OpenGL, 创建一个基于 QWindow 的最小应用程序. 在实践中, 你应该考虑使用更高级别的 QOpenGLWindow 类.
OpenGLWindow 基类
我们的 OpenGLWindow 类充当 API, 然后对其进行子类化以执行实际渲染. 它具有请求调用 render() 的函数, 调用 renderNow() 立即渲染, 也可以调用 renderLater() 在事件循环完成处理当前批次的事件后立即渲染. OpenGLWindow 子类可以重新实现 render() 以进行基于 OpenGL 的渲染, 也可以重新实现 render(QPainter *) 以使用 QPainter 进行渲染. 如果在底层 OpenGL 驱动程序中启用了垂直同步, 在render()中调用 OpenGLWindow::setAnimating(true) 使用垂直刷新.
在执行 OpenGL 渲染的类中, 你通常需要继承 QOpenGLFunctions, 就像我们的 OpenGLWindow 一样, 以便获得对 OpenGL ES 2.0 函数的独立于平台的访问. 通过从 QOpenGLFunctions 继承, 它包含的 OpenGL 函数将获得优先权, 如果你希望应用程序能够使用 OpenGL 以及 OpenGL ES 2.0, 则不必担心解析这些函数
  class OpenGLWindow : public QWindow, protected QOpenGLFunctions
  {
      Q_OBJECT
  public:
      explicit OpenGLWindow(QWindow *parent = 0);
      ~OpenGLWindow();

      virtual void render(QPainter *painter);
      virtual void render();

      virtual void initialize();

      void setAnimating(bool animating);

  public slots:
      void renderLater();
      void renderNow();

  protected:
      bool event(QEvent *event) override;

      void exposeEvent(QExposeEvent *event) override;

  private:
      bool m_animating;

      QOpenGLContext *m_context;
      QOpenGLPaintDevice *m_device;
  };
窗口的显示类型必须设置为QSurface::OpenGLSurface, 表明窗口使用OpenGL渲染, 而不是使用 QBackingStore 和 QPainter 渲染光栅内容.
  OpenGLWindow::OpenGLWindow(QWindow *parent)
      : QWindow(parent)
      , m_animating(false)
      , m_context(0)
      , m_device(0)
  {
      setSurfaceType(QWindow::OpenGLSurface);
  }
任何需要的OpenGL初始化都可以通过重写initialize()函数来完成, 该函数在第一次调用render()之前调用一次, 并使用当前的有效QOpenGLContext. 从下面的代码片段中可以看出, 默认的render(QPainter *)和initialize()实现是空的, 而默认的rener()实现初始化一个 QOpenGLPaintDevice, 然后调用render(QPainter *).
  void OpenGLWindow::render(QPainter *painter)
  {
      Q_UNUSED(painter);
  }

  void OpenGLWindow::initialize()
  {
  }

  void OpenGLWindow::render()
  {
      if (!m_device)
          m_device = new QOpenGLPaintDevice;

      glClear(GL_COLOR_BUFFER_BIT | GL_DEPTH_BUFFER_BIT | GL_STENCIL_BUFFER_BIT);

      m_device->setSize(size());

      QPainter painter(m_device);
      render(&painter);
  }
renderLater()函数只需调用QWindow::requestUpdate()由系统准备重新绘制时更新.
当我们得到一个显示事件时, 我们也调用renderNow(). exposeEvent()是通知窗口其在屏幕上的可见性已更改. 当接收到显示事件时, 你可以查询QWindow::isExposed()以了解窗口当前是否已显示. 在窗口接收到第一个公开事件之前, 不要在窗口上渲染或调用QOpenGLContext::swapBuffers(), 因为在此之前, 它的最终大小可能是未知的, 此外, 渲染的内容甚至可能不会出现在屏幕上.
  void OpenGLWindow::renderLater()
  {
      requestUpdate();
  }

  bool OpenGLWindow::event(QEvent *event)
  {
      switch (event->type()) {
      case QEvent::UpdateRequest:
          renderNow();
          return true;
      default:
          return QWindow::event(event);
      }
  }

  void OpenGLWindow::exposeEvent(QExposeEvent *event)
  {
      Q_UNUSED(event);

      if (isExposed())
          renderNow();
  }
在renderNow()中, 如果我们当前未显示, 则返回, 在这种情况下, 渲染会延迟, 直到我们实际获得显示事件. 如果我们还没有这么做, 我们将使用与在OpenGLWindow上设置相同的 QSurfaceFormat, 创建 QOpenGLContext, 调用initialize(), initializeOpenGLFunctions(), 以便 QOpenGLFunctions 与正确的 QOpenGLContext 关联. 在任何情况下, 我们可以调用 QOpenGLContext::makeCurrent() 设置当前上下文, 然后调用render()进行实际渲染, 最后我们调用 QOpenGLContext::swapBuffers() 设置渲染内容, 参数是OpenGLWindow.
Once the rendering of a frame using an OpenGL context is initiated by calling QOpenGLContext::makeCurrent(), giving the surface on which to render as a parameter, OpenGL commands can be issued. The commands can be issued either directly by including <qopengl.h>, which also includes the system's OpenGL headers, or as by using QOpenGLFunctions, which can either be inherited from for convenience, or accessed using QOpenGLContext::functions(). QOpenGLFunctions gives access to all the OpenGL ES 2.0 level OpenGL calls that are not already standard in both OpenGL ES 2.0 and desktop OpenGL. For more information about the OpenGL and OpenGL ES APIs, refer to the official OpenGL Registry and Khronos OpenGL ES API Registry.
如果调用OpenGLWindow::setAnimation(true)启用动画, 我们调用renderLater()发送更新请求.
  void OpenGLWindow::renderNow()
  {
      if (!isExposed())
          return;

      bool needsInitialize = false;

      if (!m_context) {
          m_context = new QOpenGLContext(this);
          m_context->setFormat(requestedFormat());
          m_context->create();

          needsInitialize = true;
      }

      m_context->makeCurrent(this);

      if (needsInitialize) {
          initializeOpenGLFunctions();
          initialize();
      }

      render();

      m_context->swapBuffers(this);

      if (m_animating)
          renderLater();
  }
启用动画还会以如下方式发送更新请求.
  void OpenGLWindow::setAnimating(bool animating)
  {
      m_animating = animating;

      if (animating)
          renderLater();
  }
OpenGL渲染子类示例
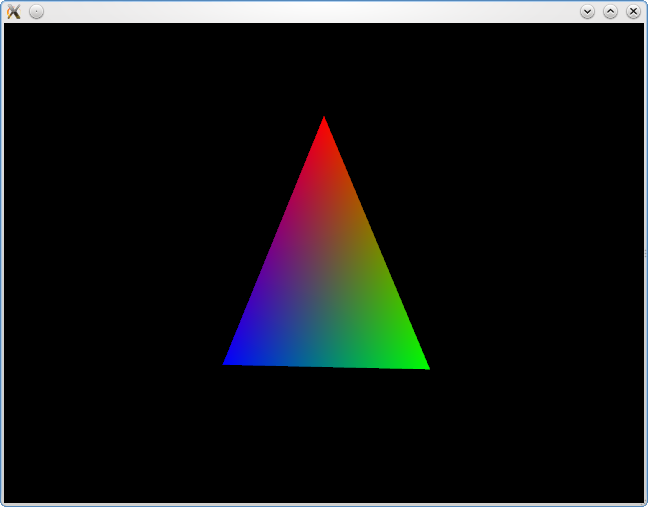
这里, 我们子类化OpenGLWindow, 展示如何使用OpenGL渲染一个旋转的三角形. By indirectly sub classing QOpenGLFunctions we gain access to all OpenGL ES 2.0 level functionality.
  class TriangleWindow : public OpenGLWindow
  {
  public:
      TriangleWindow();

      void initialize() override;
      void render() override;

  private:
      GLuint m_posAttr;
      GLuint m_colAttr;
      GLuint m_matrixUniform;

      QOpenGLShaderProgram *m_program;
      int m_frame;
  };

  TriangleWindow::TriangleWindow()
      : m_program(0)
      , m_frame(0)
  {
  }
在主函数中, 我们实例化QGuiApplication和TriangleOpenGLWindow, 使用QSurfaceFormat设置4个抗锯齿样本及默认几何大小, 调用setAnimating()设置动画.
  int main(int argc, char **argv)
  {
      QGuiApplication app(argc, argv);

      QSurfaceFormat format;
      format.setSamples(16);

      TriangleWindow window;
      window.setFormat(format);
      window.resize(640, 480);
      window.show();

      window.setAnimating(true);

      return app.exec();
  }
以下代码片段显示了本示例中使用的OpenGL着色器程序. 顶点着色器和片段着色器相对简单, 可以执行顶点变换和插值顶点着色.
  static const char *vertexShaderSource =
      "attribute highp vec4 posAttr;\n"
      "attribute lowp vec4 colAttr;\n"
      "varying lowp vec4 col;\n"
      "uniform highp mat4 matrix;\n"
      "void main() {\n"
      "   col = colAttr;\n"
      "   gl_Position = matrix * posAttr;\n"
      "}\n";

  static const char *fragmentShaderSource =
      "varying lowp vec4 col;\n"
      "void main() {\n"
      "   gl_FragColor = col;\n"
      "}\n";
以下代码加载着色器, 并初始化着色器程序. 通过使用QOpenGLShaderProgram, 而不是原始的OpenGL, 我们可以方便地去除桌面OpenGL上的highp, mediump和lowp限定符, 因为它们不是标准的一部分. 我们将属性和统一位置存储在成员变量中, 以避免每帧都进行位置查找.
  void TriangleWindow::initialize()
  {
      m_program = new QOpenGLShaderProgram(this);
      m_program->addShaderFromSourceCode(QOpenGLShader::Vertex, vertexShaderSource);
      m_program->addShaderFromSourceCode(QOpenGLShader::Fragment, fragmentShaderSource);
      m_program->link();
      m_posAttr = m_program->attributeLocation("posAttr");
      m_colAttr = m_program->attributeLocation("colAttr");
      m_matrixUniform = m_program->uniformLocation("matrix");
  }
最后, 这是我们的 render() 函数, 我们使用 OpenGL 设置视口, 清除背景并渲染一个旋转三角形.
  void TriangleWindow::render()
  {
      const qreal retinaScale = devicePixelRatio();
      glViewport(0, 0, width() * retinaScale, height() * retinaScale);

      glClear(GL_COLOR_BUFFER_BIT);

      m_program->bind();

      QMatrix4x4 matrix;
      matrix.perspective(60.0f, 4.0f/3.0f, 0.1f, 100.0f);
      matrix.translate(0, 0, -2);
      matrix.rotate(100.0f * m_frame / screen()->refreshRate(), 0, 1, 0);

      m_program->setUniformValue(m_matrixUniform, matrix);

      GLfloat vertices[] = {
          0.0f, 0.707f,
          -0.5f, -0.5f,
          0.5f, -0.5f
      };

      GLfloat colors[] = {
          1.0f, 0.0f, 0.0f,
          0.0f, 1.0f, 0.0f,
          0.0f, 0.0f, 1.0f
      };

      glVertexAttribPointer(m_posAttr, 2, GL_FLOAT, GL_FALSE, 0, vertices);
      glVertexAttribPointer(m_colAttr, 3, GL_FLOAT, GL_FALSE, 0, colors);

      glEnableVertexAttribArray(0);
      glEnableVertexAttribArray(1);

      glDrawArrays(GL_TRIANGLES, 0, 3);

      glDisableVertexAttribArray(1);
      glDisableVertexAttribArray(0);

      m_program->release();

      ++m_frame;
  }
Files: